contact

Use the form on the right to contact me.

For media enquiries, appearances and general bookings please contact Tess at Essential Lifestyle Group - tess@essentialgr.com  


123 Street Avenue, City Town, 99999

(123) 555-6789

email@address.com


You can set your address, phone number, email and site description in the settings tab.
Link to read me page with more information.

Blog

Andy Bates is known for his hearty street food. His modern twists on classic dishes are fuelled by his international travels and a passion for re-discovering and cooking great British food. As the gaffer of specialist food company ‘Eat My Pies’, Andy brings the best of British food back to the public, including classic tarts, pies, Scotch eggs and, of course, some tasty puddings.

Andy is a contributing chef for Food Network UK and has already had two successful series broadcast on the channel - Andy Bates Street Feasts and Andy Bates American Street Feasts. His latest series, Andy Bates Brazilian Street Feasts, launched in February 2014. All three series follow him as he travels across continents to explore the world of street food and find the stories and people behind the recipes. As a result, he has become a leading expert on street food, with regular appearances on the street food circuit. Andy, who lives by the quote "You should always finish on a little bit of pudding", has also written a cookbook offering modern twists on classic dishes.

Chef TV Blog Recipes 

On a global food adventure meeting inspiring people along the way.

Filtering by Tag: Dessert

Snickerdoodle Ice Cream Sandwiches

Andy Bates

This is super easy and super sweet recipe!!!

For those of you not in the know (I wasn't ;-), a 'snickerdoodle' is a type of cookie from North America that's rolled in cinnamon sugar and has a cracked surface once baked.

It’s soft, sweet and very tasty.  Your kitchen will smell amazing, and all will be good with the world. again. 

Everything can be made in advance, and you don’t even need to churn the ice cream, just mix and pop into the freezer until needed and the cookie dough mix can be made in advance and baked fresh just before needed. 

Once baked, the cookies will keep well for 4­-5 days in sealed container.

Enjoy!


MY SNICKERDOODLE ICE CREAM SANDWICHES

andy-bates-snickerdoodle-ice-cream-sandwich

MY SNICKERDOODLE ICE CREAM SANDWICHES

Ingredients

For the snickerdoodle cookies:

  • 240g butter
  • 180g light brown sugar
  • 100g caster sugar
  • 1 egg (beaten)
  • 1 tsp vanilla paste
  • 1⁄2 tsp cinnamon
  • 1⁄2 tsp bicarb
  • 1⁄2 tsp cream of tartar/baking powder
  • 1⁄2 tsp salt
  • 300g flour
  • cinnamon sugar (50g caster sugar mixed with 1 tsp cinnamon)

For the ice cream:

  • 400ml double cream
  • 400g can condensed milk
  • 1 vanilla pod
  • 50g honeycomb
  • a handful of milk chocolate shavings

Method

To make the ice cream:

Slice the vanilla pod lengthways, scrape out the black seeds and place in a bowl. Add the cream and whisk until soft peaks form. Add the condensed milk to the cream and whisk again until combined. Break the honeycomb into chunks, gently fold into the ice cream mix.

Pour into a baking tray 30cmx20cm lined with greaseproof paper that gives the ice cream 1­-2 inches in depth/thickness.

Freeze until firm.

For the Snickerdoodles:

Melt the butter and add to a bowl. Whisk together the butter and sugars until well mixed.

Add the egg, vanilla paste and combine.

Add all remaining dry ingredients and combine to a soft paste.

Transfer to a bowl or container and refrigerate until firm (at least 1 hour or more and will keep for up to 4 days in the fridge).

Roll into 25g perfect balls and then roll in the cinnamon sugar to coat.

Place on a baking tray with ample space between and bake 10-­12 minutes at 170C, then allow to cool.

To assemble:

Cut the ice cream with a round cutter/mould the same size as the snickerdoodles.

Turn a snickerdoodle upside down, place the cut ice cream on top, place a second snickerdoodle facing up on top and gently press down to adhere or make 'a sandwich'.

Pop back into the freezer till needed and continue to make sandwiches.

To serve, roll half of the sandwich in chocolate shavings. 

Pumpkin Pie

Andy Bates

andy-bates-pumpkin-pie

Ingredients

For the pastry:

  • 225g plain flour
  • Pinch of salt
  • 150g butter, cold & cut into cubes
  • 75g icing sugar
  • 1 free-range egg

For the filling:

  • 700g mashed, cooked pumpkin passed through a sieve
  • 200ml evaporated milk
  • 200ml double cream
  • 3 free-range eggs, beaten
  • 2 egg yolk
  • 200g light brown sugar
  • 1/2 tsp salt
  • 1/2 tsp ground ginger
  • 1/2 tsp ground cinnamon
  • Nutmeg to grate

Method


Preheat the oven to 180°C/gas mark 4.

For the pastry:


In a food processor mix together the flour and sugar then add the butter, and whiz until the mixture resembles breadcrumbs. Empty into a bowl then beat together the egg and slowly add, mixing until the pastry forms a ball. Wrap tightly in cling film and refrigerate for two hours.

Roll out the pastry on a lightly floured surface to a 2mm thickness. Use to line a 28cm tart ring placed on a baking sheet. Rest the lined tart ring in the fridge for 20 minutes.

Line the tart ring with greaseproof paper and fill with baking beans to keep the base's shape, and bake blind for about 20 minutes. Remove the greaseproof paper and baking beans and return to the oven for 5-8 minutes or until the pastry starts to turn golden brown. Remove from the oven and brush with egg yolk and allow to cool.

Turn the oven down to 160°C/gas mark 3.


FOR THE FILLING:


Bring the cream, sugar and spices to the boil then quickly whisk onto beaten eggs. Add the pumpkin mix and gently beat in until everything is mixed. 

Fill the pastry case with the pumpkin mix. Carefully place in the middle of the oven and bake for 40-45 minutes or until the mix appears set but not too firm. Remove from the oven and cover the surface liberally with grated nutmeg.

Allow to cool to room temperature before serving.

Rhubarb & Custard Shortcake Pots

Andy Bates

What to do with all this rhubarb?

So I have been chosen to make a hamper for next week's cricket for the chaps (ENG vs NZ ODI at the Oval for those of you interested) and after years of taking food to sporting events, festivals, picnics, etc. I think I’ve finally worked out a few things…

  • Chop and slice everything before you go, no matter how good it looks! 
  • Separate and portion into individual boxes
  • Hand held and bowl food is the way forward

See the thing is that although a big spread looks the business, passing plates and dishes around amongst each other in small rows of seats with one hand already taken up with a beer is not exactly ideal. And I’ve not even mentioned the weather yet.

I’ve got a recipe here that looks the part, travels well and all you have to do is stick a spoon in it. Perfect for a summer hamper and is also a great dinner party dessert served fresh from the oven. The pastry is a cross between shortbread biscuit and a sponge cake, crispy on the outside and dense in the middle. The rhubarb filling can be swapped with any seasonal fruit to your liking.


My Rhubarb & Custard Shortcake Pots

andy-bates-rhubard-custard-shortcake-pots

makes 4

INGREDIENTS

FOR THE PASTRY:

  • 200g butter
  • 200g golden caster sugar
  • 325g self-raising flour
  • 1 egg
  • 1 yolk
  • more sugar for sprinkling

FOR THE FILLING:

  • 300g rhubarb
  • 50g sugar
  • 150g tinned custard (Yes, use the best quality you can find!)
  • 1tsp vanilla paste


METHOD

In a food processor, cream the butter and sugar until light and fluffy. add the egg and yolk. Gently fold in the flour and mix to a sticky dough. Wrap in clingfilm and refrigerate for 1 hour. The pastry will make enough for 8 ramekins or one large pie. Wrap and freeze any leftover.

Pre-heat oven to 180C or gas mark 4.

andy-bates-rhubard-custard-shortcake-pots

Chop the rhubarb into 2cm chunks, place into a baking tray cover with the sugar and bake for 8-10 minutes or until softened. Mix with the custard and vanilla paste and allow to cool.

Grease the ramekins, take a piece of the dough big enough to cover the base and gently push in. Repeat with the sides so that even thickness of dough covers the base and sides. Fill each ramekin just to the top with the rhubarb and custard mix, then take larger piece of dough to be used as the lid and flatten to 1cm thick and cut around with the ramekin as a guide. Place on top and crimp the edges.

Brush with milk, sprinkle with golden caster sugar and bake for 35 minutes.

Either eat after 10 minutes or chill for the next day. A dollop of creme fraiche works as treat on the side :)

Slow Cooker Mini Hazelnut Cheesecake

Andy Bates

Here is another unconventional slow cooker recipe... 

This cheesecake is slowly ‘steamed’ rather than baked but still gives a dense and rich finish. I love the flavours of hazelnut and coffee and topped with a Nutella oat crumble you can’t go wrong.


My Mini Hazelnut Cheesecake 

image.jpg

Ingredients

(makes one 6" x 3" spring cake tin, serves 6)

For the base:

  • 6 milk chocolate digestives
  • 30g unsalted butter (melted)

For the filling:

  • 75g hazelnut praline paste (can be store bought but home-made is best, recipe below)
    • 75g hazelnuts
    • 75g golden caster sugar
    • pinch of salt
  • 450g cream cheese
  • 150g caster sugar
  • pinch of salt 
  • 1 shot of espresso
  • 50g sour cream
  • 1tsp vanilla paste
  • 2 eggs (beaten)

For the topping:

  • 1tbsp butter (melted)
  • 50g caster sugar
  • 40ml milk
  • pinch of sea salt
  • 75g Nutella 
  • 25g oats 

Method

image.jpg
image.jpg

To make the hazelnut praline paste, preheat your oven to 180C/gas mark 4 and place your hazelnuts on a tray. Place in the oven for 5-8 minutes until the skins start to spilt, take out and when cool enough rub the hazelnuts in your hands and the skin will easily rub off. You can also purchase blanched hazelnuts and skip the peeling process, but you will still need to toast them. 

Add the sugar to a pan and over a low heat, it will start to melt very quickly and become a caramel. When complete, remove from the heat and add your hazelnuts. Place on a tray to cool but remember to not place in the fridge. When cooled, smash up the praline and place in the food processor to blitz. *This will make extra and will keep in the fridge for about a month, spread a bit on toast and thank me later ;)

Fill your slow cooker with 1/2 inch of water then place a foil rack in the centre so that the cake tin can sit above the water level. A foil base can be easily made by rolling and shaping aluminium foil into a square to about 1/2 inch thickness and the length to balance the cake tin.

In a food processor, blitz the biscuits and melted butter till combined then transfer to the bottom of the cake tin and press evenly down to make the base.

In a bowl, add the cream cheese, sugar, salt and whisk quickly to combine. Next add the eggs, sour cream, coffee, vanilla paste and whisk till combined for only about 20 seconds. Be careful not to over mix.

image.jpg

Pour onto the biscuit base and transfer to the slow cooker and cook for 1.25 & 1.5 hours. Take out, rest and chill until ready to serve. Be careful not to overcook as it can split.

For the topping, add the butter, sugar, milk and pinch of salt to a small sauce pan and stir. Bring to the boil and simmer for 1 minute and remove from the heat. Add the Nutella and stir in until smooth, then add the oats stirring until completely covered. Lay mixture and flatten out onto non-stick greaseproof paper and allow to cool and firm up, which will take about an hour. Once it has firmed, break and sprinkle over top of the cheesecake. *There will be leftovers which make ideal gluten free non bake cookies.   

andy-bates-bbc-two-food-and-drink

Slow Cooker Apple, Pear and Peanut Butter Crumble

Andy Bates

For my first adventure as the roving reporter for BBC's new series of Food and Drink... I was sent to meet Miss South, a slow cooker expert. Many of us have slow cookers but they do tend to spend a lot of time kept away in the cupboard. So this was the perfect opportunity to show me that there’s much more than stews and curries with a slow cooker but also ribs, bread, brownies, puddings and jams to name a few. Intrigued by a challenge and a sucker for a dessert I have come up with a sweet recipe for you to try.

This apple, pear & peanut butter crumble could not be any simpler with 10 minutes of preparation time then just leave and let your slow cooker do all the work. The crust (to my surprise) comes out great with a dense cake like texture and the fruit holds its shape does not ‘mush’ up even with 4-5 hours of cooking. As with that all crumbles, serve with cream, custard or like me both!


My Apple, Pear and Peanut Butter Crumble 

image.jpg

Ingredients

  • 2 apples (peeled & roughly chopped) 
  • 2 pears (peeled & roughly chopped)
  • 50g golden caster sugar
  • 1tsp vanilla paste
  • 50ml apple juice
  • 1/2tsp cinnamon

For the crumble topping:

  • 50g peanut butter
  • 75g butter
  • 150g oats
  • 150g plain flour
  • 200g caster sugar 

Method

image.jpg

Place the apples, pears and apple juice directly into the slow cooker. Add the vanilla paste, cinnamon and golden caster sugar and stir until well mixed. 

Now for the crumble topping, in a saucepan gently melt the butter and peanut butter and take off the heat. Grab a large bowl and add the oats, flour and sugar mix through then slowly add the peanut butter mixture till combined. 

Scatter the crumble topping over the fruit in the slow cooker and gently pat down. 

Cover and cook for approximately 5 hours. 

Serve warm with cream or ice cream. 

andy-bates-bbc-two-food-and-drink

Milk Chocolate Tart

Andy Bates

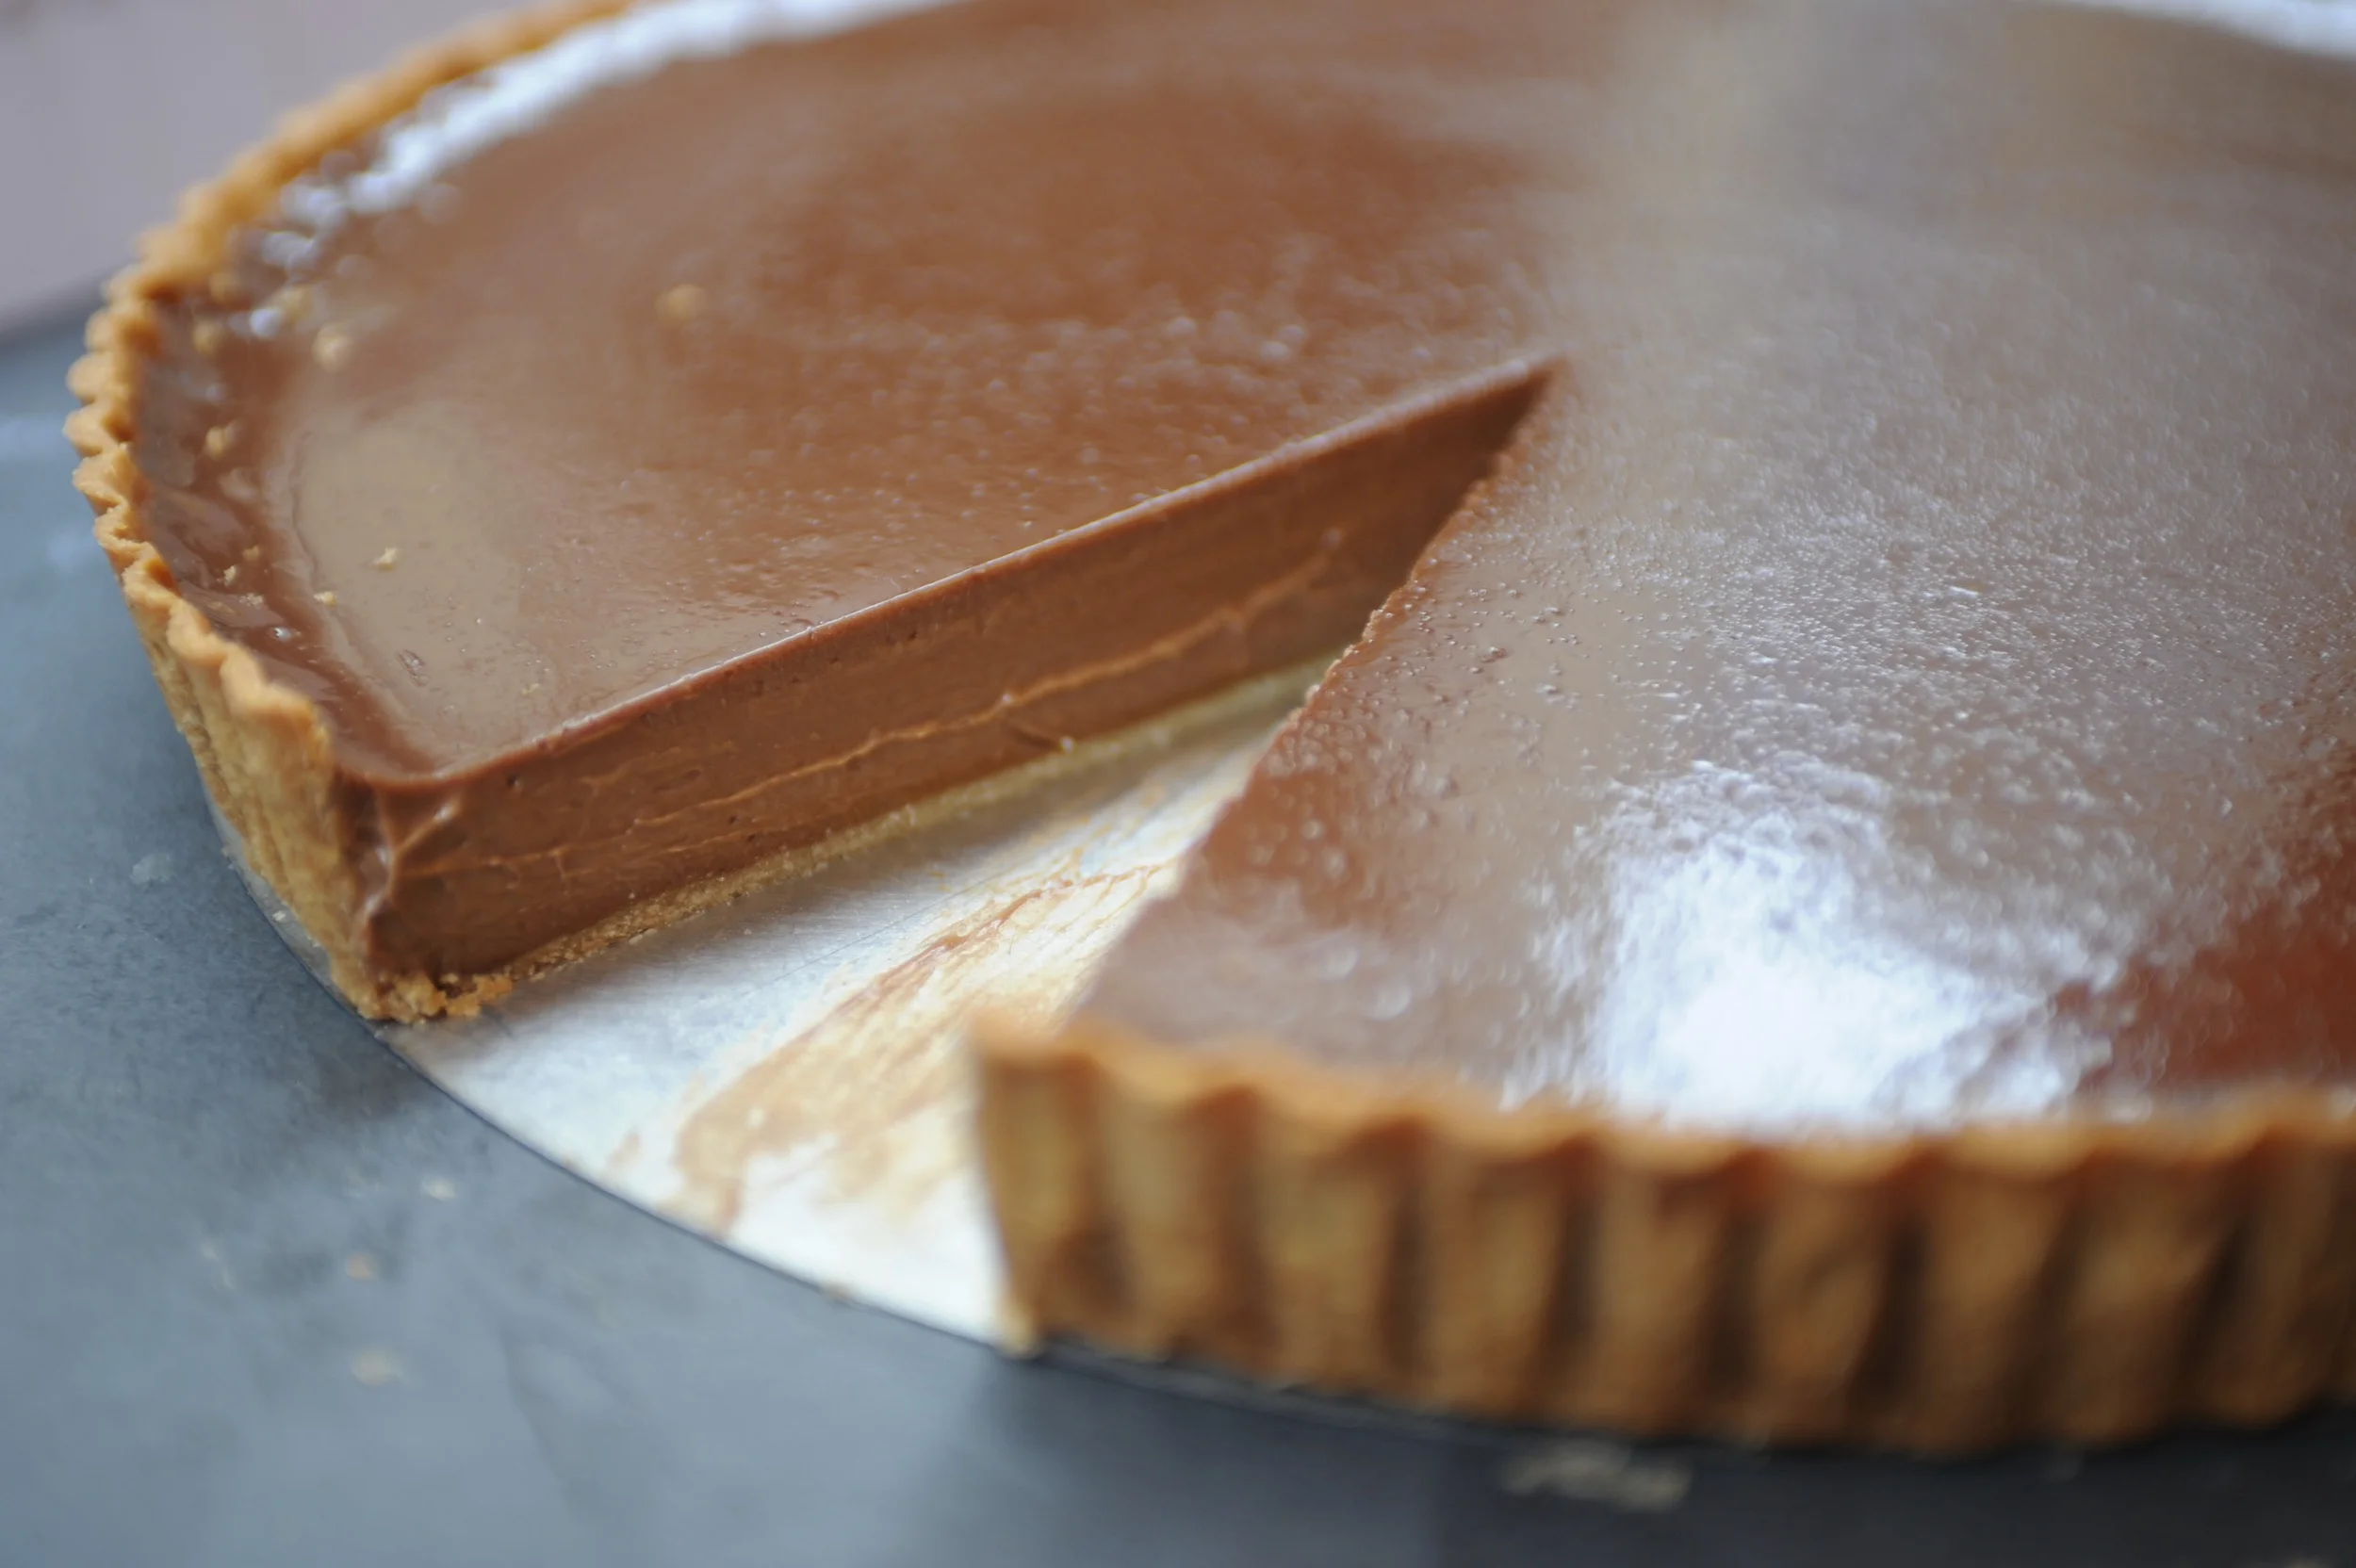
Everyone raves about dark chocolate and how the high cocoa content makes it the most superior of all chocolates, but I love the smoothness and sweetness of milk chocolate. Gimme CANDY any day! And there are lots of people who will agree, as this is one of the cornerstones of my business. Use a high-sided tin for an extra deep milk chocolate filling and for the finishing touches, dust with cocoa powder and serve with thick cream.

This rich and indulgent chocolate dessert is sure to become a firm dinner-party favourite.

andy-milk-chocolate-tart

A FEW PASTRY TIPS...

  • Clean, cold hands give best results when working with pastry.
  • Careful not to over mix when making the dough.
  • When rolling the pastry... roll on a cold, dry surface.
  • When blind baking, push the 'baking beans' into the corners as mush as possible to retain the shape of the tin.
  • Do not be beaten by pastry... YOU ARE THE BOSS!

MY MILK CHOCOLATE TART

andy-milk-chocolate-tart

Ingredients

(serves 8 - 10)

FOR THE SWEET CRUST PASTRY:

  • 225g plain flour, plus extra for dusting
  • 75g icing sugar
  • Pinch of salt
  • 150g butter
  • 1 free-range egg (beaten)
  • egg yolk for brushing

FOR THE FILLING:

  • 600g of milk chocolate (over 35% cocoa)
  • 450ml single cream
  • 150ml whole milk
  • 3 free-range eggs
andy-rolling-pastry

Method

andy-rolling-pastry
andy-rolling-pastry

FOR THE SWEET CRUST PASTRY:

In a food processor, mix together the flour, sugar and salt, then add the butter and mix until the mixture resembles bread crumbs. Be careful not to over mix. Next add the beaten egg and pulse until the pastry forms a ball (Unlike short crust, the pastry will be more paste-like and a little sticky). Wrap the dough in clean-film and chill for at least an hour and allow to firm up.

andy-rolling-pastry

*Note: If you're making by hand, sift all the dry ingredients into a bowl and gently rub in the butter between your fingers until you have a bread crumb like consistency, mix in the beaten egg until the dough comes together. Wrap the dough in clean-film as per recipe.

Preheat the oven at 180°C/Gas 4.

andy-rolling-pastry

Roll out the pastry on a lightly floured surface to 2mm thickness. Use pastry to line a 28cm/4cm tart ring placed on a baking sheet. Rest the lined tart ring in the fridge for 20 mins.

andy-rolling-pastry
andy-rolling-pastry

Line the rolled tart ring with greaseproof paper and fill with baking beans to keep the dough from losing its shape and rising when cooking. Bake blind for about 20 minutes. Remove the greaseproof paper and baking beans and return to the oven for 5 to 8 mins or until the sweet crust pasty is starting to turn golden. Take out of oven, brush all over with egg yolk and return to the oven for 1 minute to 'dry' out (The egg yolk when dried will act as a barrier preventing the filling from escaping through any holes or cracks in the crust).

andy-pie-pastry

Turn the oven down to 130°C/Gas 1.

FOR THE FILLING:

Into a bowl break the chocolate into bite size pieces, bring the cream and milk to a boil and pour over the chocolate and stir until chocolate and cream are mixed. Allow to cool for 5 mins. Beat the eggs then add to the chocolate and mix well. Skim with a ladle if lots of froth/bubbles.

Fill the pastry with the chocolate filling. Carefully place in the middle of the oven and bake for 25 to 35 minutes or until the filling appears set but with a slight wobble. Do not allow filling to boil and rise.

Allow to cool to room temperature before serving. Dust with cocoa powder and serve with thick cream.

andy-milk-chocolate-tart


Alternatively... Why not try white chocolate instead of milk chocolate and cover with raspberries once cooked and rested.

Pineapple Cake with Passion Fruit & Caipirinha Drizzle

Andy Bates

During a visit to a local street market in Rio I find a stall set up next to a local jazz band selling Caipirinhas, lots of them! The owner of this stall/bar is Luizinho and he's a local legend. He set up his stall in the mid 1990's when he was placed in charge of serving cocktails during a political campaign. This triggered invites to other events which eventually led to his own business. Nowadays he is at his happiest talking to his customers, listening to music and of course making cocktails.

His caipirinhas are made in the traditional way with lime, sugar and Cachaca (Brazilian rum) but also with tropical fresh fruit and berries which make them very drinkable indeed. Luizinho then gets me behind his bar to give me a lesson in caipirinha making. As I look around I begin to understand exactly why he has chose this as his profession, the sun is shining, people are smiling, chatting and dancing. And of course the cocktails are flowing, it's a street celebration!

And what better way to celebrate than with cake... I've based the flavours in this cake around the caipirinha cocktail and my favourite combination that I tasted that day which was Cachaca, pineapple and passion fruit. 

ENJOY!


My Pineapple Cake with Passion Fruit & Caipirinha Drizzle

pineapple-cake

Ingredients

  • 1 medium pineapple, peeled, cored and sliced
  • 175g caster sugar
  • 125g plain flour
  • 2 teaspoons baking powder
  • ½ teaspoon salt
  • 50g desiccated coconut
  • 1 large egg
  • 2 egg yolks
  • 175g unsalted butter, melted, plus extra for greasing
  • 250ml whole milk
  • 1 teaspoon vanilla extract

For the drizzle:

  • 2 passion fruit
  • 50g icing sugar
  • 50ml cachaca
  • Juice of 1 lime

Method

Preheat the oven to 160 degrees Celsius or 325 degrees Fahrenheit and grease and line a 23cm springform cake tin with baking parchment.

Place the pineapple slices and 50 grams of the sugar into a large non-stick frying pan and cook gently for 4 to 5 minutes until caramelised. Set aside to cool.

Sift the flour, baking powder and salt into a large bowl and stir in the desiccated coconut and the remaining sugar. In a separate bowl, whisk together the egg yolk, eggs, melted butter, milk and vanilla until smooth.

Stir the mixture into the dry ingredients to make a smooth batter. Transfer a few spoonfuls of the batter into a separate bowl. Mix the pineapple slices with the larger amount of batter and pour into the lined tin.

Give the tin a tap to knock out any air bubbles then pour the reserved batter over the top. Bake for 40 to 45 minutes or until set with a slight wobble in the centre.

Transfer to a wire rack, leave to cool slightly then prick the surface all over with a toothpick or small skewer.

Meanwhile, cut the passion fruit in half and spoon the flesh into a small food processor. Pulse a few times to break down the pulp and loosen the seeds then pour into a bowl with the remaining ingredients.

Stir until the sugar has dissolved then spoon over the cake. Leave the cake to cool completely then cut into wedges and serve.

Mango Tarte Tatin with Coconut & Peanut Brittle

Andy Bates

Salvador! The biggest and busiest city in the northeast of Brazil, Salvador is known for its architecture, history, music and mind-blowing gastronomy. The locals pride themselves on using regional produce and there's a huge variety of natural products to choose. I met Mariana, who's got a huge knowledge of the local produce, but she is actually from the south of Brazil. She says that when she arrived in Salvador, they introduced her to a completely different world. Where the variety of fresh produce is almost overwhelming, from palm oil to green tomatoes, there is a lot more choices. The variety of local products together with a strong African influence makes the food of Bahia utterly special. One of the ever present products is coconut and the Bahia state is the biggest consumer of coconut in all of Brazil. I was then taken to try Cocada - A sweet coconut snack made with condensed milk. The Brazilians like their treats sweet and everyone seems to have a sweet tooth!

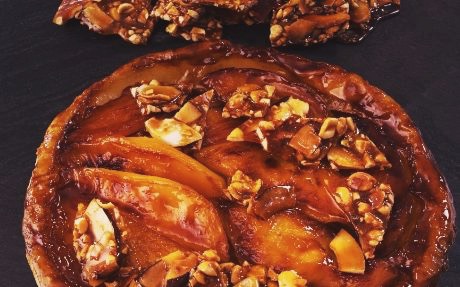
The coconut and it's flavours have inspired this dessert and with the abundance of mango juice in Brasil I just had to incorporate their flavour into this dish. The crunchiness of the brittle works well with the soft mango and giving a real tropical kick to it too.


My Mango Tarte Tatin with coconut and peanut brittle 

andy-bates-mango-tarte-tatin

INGREDIENTS

FOR THE COCONUT BRITTLE:

  • 150g caster sugar
  • 50g salted peanuts, roughly chopped
  • 25g dessicated coconut

FOR THE MANGO TARTE TATIN:

  • 150g caster sugar
  • 50g unsalted butter
  • 2 mangos, peeled and cut into thick wedges
  • 1 sheet ready rolled puff pastry

METHOD

Preheat the oven to 200 degrees Celsius or 400 degrees Fahrenheit.

Line a baking sheet with greaseproof paper or a silicone sheet. Pour the sugar into a heavy-based, non-stick frying pan and set over a medium heat. Gently tilt and swirl the pan (do not stir) until the sugar has melted and turns a deep caramel colour.

Add the peanuts and coconut and stir to combine. Pour the mixture into the lined tray and leave to cool. When cool, break into shards and set aside.

For the mango tart, unroll the pastry and cut out a circle the same diameter as the pan you’re going to use. Heat the sugar and butter in a 20cm non-stick frying pan until the sugar has melted and turned a deep caramel colour.

Remove from the heat and leave to cool slightly. Add the mango wedges and shake gently until they start to caramelise. Remove from the heat then lay the pastry over the top.

Bake for 20 minutes until the pastry in risen and golden. Leave to cool slightly then turn out onto a plate. Serve the mango tart topped with shards of the brittle.

Banana, Caramel & Hazelnut Baked Alaska

Andy Bates

andy-bates-baked-alaska

I continued my journey thru the Municipal Market of São Paulo where my guide Mauricio,  took me to try something sweet. 

Leonardo & his mum

Leonardo & his mum

Leonardo Chiappetta runs a family own emporium, the stall is very colourful and has over 2,500 ingredients at any given time. Leonardo has been coming to this market since he was 8 years old and started the business with his father, he feels that they are a small piece of history in the beautiful mix of the market. But Leonardo's favourite treat from his emporium has to be his Italian-style ice cream with a Brazilian twist. 

It was Leonardo's scrummy combination of ice cream, banana, caramel and nuts that give me the idea for this rather yummy and fun Baked Alaska. I also threw some rum into the mix which really works well in the banana ice cream.

Please try this recipe... it is a real WINNER!


My Banana, Caramel & Hazelnut Baked Alaska

Andy shows you how to make this delicious showstopping ice cream pudding. Click here to subscribe for weekly videos: http://youtube.com/andybateschef?sub_confirmation=1 Find the full recipe here: http://www.foodnetwork.co.uk/video/banana-caramel-and-hazelnut-baked-alaska.html

Ingredients

For the ice cream:

  • 100 grams caster sugar
  • 4 large ripe bananas, roughly chopped
  • Splash dark rum
  • 400 millilitres double cream
  • 1 tsp vanilla pod paste

For the sponge:

  • 150 grams soft unsalted butter, plus extra for greasing
  • 150 grams light muscovado sugar
  • 2 eggs, beaten
  • 60 grams ground almonds
  • 120 grams self-raising flour, sifted
  • ½ teaspoon baking powder
  • 100 millilitres sour cream
  • 1 tsp vanilla extract

For the hazelnut meringue:

  • 75 grams toasted hazelnuts
  • 200 grams caster sugar
  • 4 large egg whites
  • Pinch salt

For the topping:

  • 75 grams dark chocolate, melted
  • 50 grams toasted hazelnuts, roughly chopped

Method

First make the ice cream. Heat the sugar in a large, heavy-based frying pan until completely melted.

When the sugar starts to turn a light caramel colour, add the bananas and shake the pan gently to coat. Cook for two minutes until caramelised then remove from the heat and pour in the rum.

Leave to bubble for a minute then pour in the cream and vanilla. Stir to combine and scrape up any bits of caramel from the bottom of the pan then pour into a liquidiser and blend until smooth. Churn in an ice cream machine until set.

When set, spoon the ice cream into a 500ml bowl lined with cling film and return to the freezer. Preheat the oven to 180 degrees Celsius or 350 degrees Fahrenheit and grease and line a 20cm loose-bottomed cake tin.

Cream the butter and sugar with electric beaters until pale and fluffy. Beat in the eggs, one at a time, then add the ground almonds and beat until smooth. Sift in the flour and baking powder and stir in gently, keeping as much air in the mixture as possible.

Fold in the sour cream and vanilla extract then spoon into the lined tin. Bake for 20 to 25 minutes until a skewer inserted into the middle of the cake comes out clean.

Transfer to a wire rack to cool. When the cake is cool, use a 500ml bowl (the same as used for moulding the ice cream) as a template to cut a disc from the centre of the cake.

Increase the oven temperature to 200 degrees Celsius or 400 degrees Fahrenheit. Line a baking tray with greaseproof paper and lay the sponge disc on top. Turn the ice cream out, lay on top of the sponge and return to the freezer whilst you make the meringue.

Put the hazelnuts and 2 tablespoons of the sugar into a food processor and blitz until fine. whisk the eggs whites with a pinch of salt to stiff peaks then gradually whisk in the sugar until stiff and glossy.

Fold in the ground hazelnuts, keeping as much air in the mixture as possible. Spread the meringue over the ice cream and sponge in an even layer, making sure there are no gaps or holes.

Bake for 10 minutes until crisp. Drizzle the baked Alaska with the melted chocolate, sprinkle with chopped hazelnuts and serve immediately.